If you’re a newcomer to Monster Hunter: World, this guide will get you started. We’ll go through the basics of equipment and weapons, as well as the best Hammer Builds for each weapon class so that you can climb from low rank to high rank with ease!
The “monster hunter rise hammer build reddit” is a great build for beginners. It has high attack power and can take down monsters quickly.

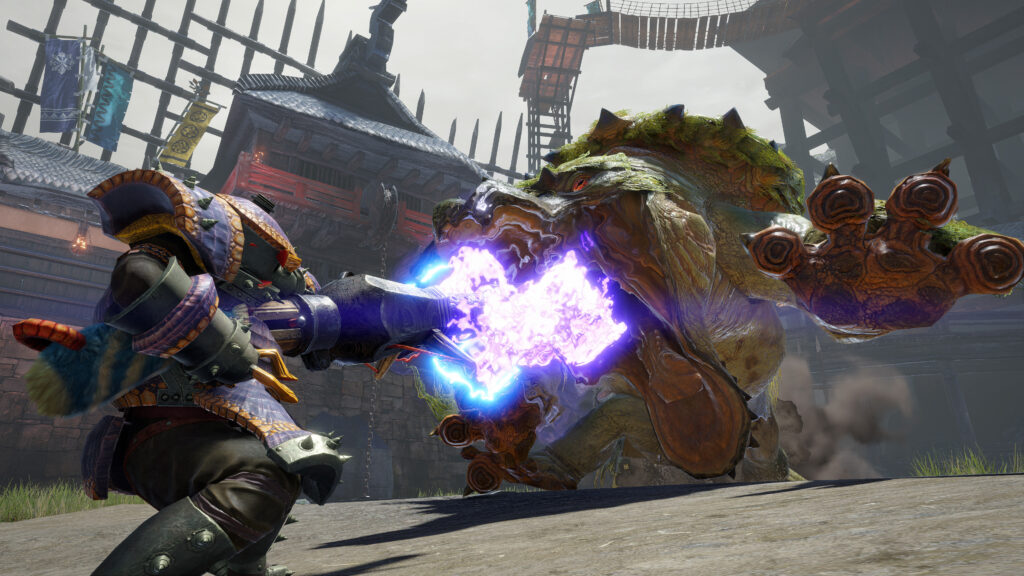
The hammer may be the most enjoyable weapon in Monster Hunter Rise. You’re not searching for meters, shelling kinds, or ammunition trackers when you attach a rock to the end of a long stick. You want to make a mess. Crush until everything is crushed and then crush some more. Hammer foregoes intricacy in favor of delivering massive damage.
So you may join the ranks of the Hammerbro and enjoy the fun side of blunt-force trauma, we’ve put together some of our top choices for the greatest Hammer builds in Monster Hunter Rise.
Come on, hunters, let’s get this party started!
Further Reading:
Are you looking for additional Monster Hunter cheats? To see all of our Monster Hunter Series guides, go here.
MHR’s Best Hammers
Because hammers are all about delivering raw damage, you’ll want to look for sharpness, damage, and affinity. Specialized builds may benefit from elemental damage, but they seldom outdamage raw damage, so choose something that will strike hard. Our picks for the greatest Hammers in Rise are listed here.
| Weapon | Damage Unprocessed | Element/Status | Affinity |
|---|---|---|---|
| Eternal Night | 180 | None | 45% |
| Tigrex Hammer is a Tigrex product. is a Tigrex product. | 220 | None | -20% |
| S – Rampage Hammer | 210 | None | 0% |
While the raw damage of the Nargacuga Hammer is minimal, the basic 45 percent affinity is ridiculously high, and the natural white is difficult to give up. The level 2 slot is the icing on top, since it allows you to include all of the talents you want in your design.
The Tigrex Hammer is a close second to Eternal Night. This Hammer has the potential to do greater damage, but due to its negative affinity and shortage of slots, your build will have less room.
The customizability of the S – Rampage Hammer has earned it a spot on the list. With the correct rampage skills, you can help it compete with the other two Hammers by increasing its damage and sharpness. You may also make it seem to be any other Hammer.
MHR’s Best Hammer Switch Skills
Because of the Hammer’s simple moveset, there isn’t much diversity in the Switch Skills, and many of them seem redundant. We’ve broken down the different talents below, but don’t be shocked if you select your favorite early on and never use the others.
Smash on the side (Switch Skill 1A)
 Capcom courtesy of HGG / Jacob Johnson
- Description: A hammer swipe to the side.
- A is the control key.
- How to Unlock: This feature is enabled by default.
Side Smash is another one of those Switch Skills that performs exactly what it says on the box. Although the range is limited, it may be used to combine with the second strike of the overhead smash combination. There’s a strong possibility you’ll never use Side Smash again after you’ve achieved Strike of Water.
Strike of Water (Switch Skill 1B)
 Capcom courtesy of HGG / Jacob Johnson
- An attack that enables you to absorb the damage of a monster.
- A is the control key.
- Complete the 5 Hub Quest “Honing your Hammer” to unlock it.
The first defensive move in Hammer’s moveset is Strike of Water. You may get immunity to the monster’s assault if you click the button immediately before it falls. You may combo immediately into an upswing attack if you successfully counter an attack with this.
The window for the counter might be challenging to time. I like to imagine it as smashing the assault aside with the hammer to get the time just perfect. If you’re having problems with the Toadversary on a hunt, try practicing with it.
Spinning Bludgeon Silkbind (Switch Skill 2A)
 Sorry for the inconvenience, little one. (Photo courtesy of Capcom through HGG / Jacob Johnson)
- A Wirebug is used to perform a spinning assault.
- Press X while holding ZL to control the game (requires 1 Wirebug)
- How to Unlock: This feature is enabled by default.
Monster Hunter World’s mid-air spinning move is back, but with the assistance of a Wirebug, you don’t even need a slope to slide down. This move is useful for getting to lofty monster heads or dealing with flyers.
By holding ZR at the start up, you may charge this strike for additional damage. If you’re currently charging your hammer at the time you launch this strike, the charge level will be carried over.
Breaking Point (Switch Skill 2B)

- The assault is carried out by rushing forward with the assistance of a Wirebug.
- Press X while holding ZL to control the game (requires 1 Wirebug)
- Unlock 3 Village Quests or 2 Hub Quests by completing 3 Village Quests or 2 Hub Quests.
Dash Breaker trades part of Spinning Bludgeon Silkbind’s damage and multi-hit potential for knockback and damage resistance during the dash animation. This is a convenient approach to deal with roars if you don’t want to employ Strike of Water.
You may charge your hammer before performing this move, like as Spinning Bludgeon Silkbind, to boost its damage. If you press ZR again just after the attack ends, you’ll get back the same charge level you just expended, which might be useful.
Charge (Switch Skill 3A) Strengthening the switch
 Capcom courtesy of HGG / Jacob Johnson
- Charge attacks get increased damage and stun as a result of this ability.
- Controls: While charging with ZR, press A.
- How to Unlock: This feature is enabled by default.
Although the in-game description claims that utilizing Strength Charge Switch would extend the charge time for higher power, I noticed that the charge durations were equal when I tested it. There isn’t much of a difference in charge times when you have Strength activated.
This move alters the animations of your swings, but it mostly provides additional hits or range. Essentially, you’ll just turn off Strength charges to earn a free level 3 charge, then put it back on again.
Courage is the charge switch. (Switch Skill 3B)
 Capcom courtesy of HGG / Jacob Johnson
- Charge levels are reduced, however combinations are allowed between charge strikes.
- Controls: While charging with ZR, press A.
- How to get it: Make or upgrade 8 different Hammers.
Charge Switch: Courage aims to spice things up and transform the Hammer into a combination weapon, whilst Strength Charge Switch makes the hammer stronger at everything it currently does. With this active, your charges only have two levels, but each one flows well into the next. If you charge to the second level, each charge strike will hit twice, presumably to aid the Hammer in dealing elemental damage or accumulating status afflictions.
MHR’s Best Hammer Builds
We’ve compiled a list of the top hammer builds for MH Rise so you can get the most out of your Hammer.
Early Ranks (Build 1)
 Capcom courtesy of HGG / Jacob Johnson
Early on, your skill options are restricted, but if you select the Hammer, you’re simply interested in doing damage. This build focuses on gaining as much Attack Boost as possible as soon as feasible in order to clean up low rank.
| Weapon | Armor |
|---|---|
| Name of the Weapon | Barroth Helm is a character in the game Barroth Helm |
| Side Smash | Mail from Barroth |
| Spinning Bludgeon Silkbind | Gauntlets Jaggi |
| Strength Charge Switch | Elytra Skalda |
| Greaves, Baggi |
You don’t need to bother about stuff like rampaging skills or decorating right now since you’re so young. The goal of this construct is to build up as much attack as possible and then go out and slap the local wildlife in the face.
You’ll ultimately get entry to the Anjantah battle if you’ve done enough slapping. His armor seems to have been made specifically for the Hammer, so go ahead and construct the complete set; it should get you rather far into High Rank.
Valstrax is the second build.
 Capcom courtesy of HGG / Jacob Johnson
The Night Eternal Hammer’s 45 percent basic affinity begs to be coupled with Master’s Touch to extend the sharpness. This build uses it, as well as the Valstrax’s Dragonheart talent, to do a lot of damage while remaining white.
| Weapon | Armor | Prioritize your skills |
|---|---|---|
| Night Eternal | Helm of Valstrax | 1st Critical Eye |
| 3rd Attack Boost | Mail from Valstrax | 3rd critical boost |
| Water Strike | Braces Valstrax | 3rd Master’s Touch |
| Silkbind Spinning Bludgeon | Coil Valstrax | Sharpening Speed 3 |
| Strength Charge Switch | Greaves Valstrax | 7th Attack Boost |
With the Valstrax armor’s Weakness Exploit, you just need 1 point of Critical Eye to strike 100% affinity on weak places. When you combine it with three points of Critical Boost and Master’s Touch, your white sharpness will endure the whole battle as you land strong critical blows.
Keep in mind that if you’re wearing Valstrax armor, you’ll want to keep your health below 80% when battling. This will trigger the Dragonheart talent, which will increase your damage by 10%.
Impact Crater Creator (Build 3)
 To purchase all of these armor sets, I had to obtain a second job. (Photo courtesy of Capcom through HGG / Jacob Johnson)
The Hammer’s Impact Crater Silkbind strike is incredibly spectacular and thrilling to land. Fortunately, the flashiness is backed up with massive damage statistics, so you may use it as often as you like. While it should be a part of your Hammer play regardless of the build you pick, this build will emphasize utilizing it as often as possible. You’re going to turn into a walking, talking meteor.
| Weapon | Armor | Prioritize your skills |
|---|---|---|
| Tigrex Hammer | Crown of Kaiser Wilhelm II | 7th Critical Eye |
| Boost Silkbind | S Kamura Garb | 3rd Weakness Exploitation |
| Water Strike | Braces Valstrax | 3rd critical boost |
| Silkbind Spinning Bludgeon | S S Anjanath Coil Anjanath Coil S Anjanath Coil S Anjanath Coil Anjanath Coil S Anjanath Coil S Anjanath Coil S | Wirebug Whisperer 3 is the third installment in the Wirebug Whisperer series. |
| Charge Switch: Strength | S. Ingot Greaves | 7th Attack Boost |
Because this build relies heavily on Impact Crater, investing three points in Wirebug Whisperer will allow you to utilize the ability more often. The Silkbind Boost rampage skill will enhance the damage of your Impact Craters, but you’ll need to ramp up the War Mace on the Ore Tree to use it with the Tigrex Hammer. You’ll be able to tack Silkbind Boost onto the Tigrex Hammer this way.
When a large opening appears, use an Impact Crater (charged, of course), then use the Silkbind Spinning Bludgeon after your initial Wirebug is no longer on cooldown. Both bugs should come off cooldown at the same time, providing you the opportunity to fire another Impact Crater.
You may also simply pick up a third Wirebug on your way to the battle. You’ve now followed up your Impact Crater with a second Impact Crater.
It would be negligent of me not to address two flaws in this design. To begin with, the Kamura Garb S has 3 points in the talents you’re seeking for, but even when completely upgraded, the defense will be relatively low. You may switch it out for something like the Nargacuga chest piece if you need more protection. Just remember that your build will be a tad narrower in terms of skill.
Second, even if Critical Eye and Weakness Exploit are both maxed up, your affinity for weak locations will be 70%. Extra affinity from other sources, such as a friendly Hunting Horn, Bow, or Palico, is preferable for this setup.
Big Bludgeoner (Build 4)
 Capcom courtesy of HGG / Jacob Johnson
After we finish this tutorial, we’ll spice it up with some unusual builds from Monster Hunter’s crazy side. To begin, this build focuses on utilizing the Bludgeoner talent. I’ll be the first to say that this won’t earn you the fastest clear times, but c’mon, the talent is named Bludgeoner for a reason. What should you do with a Hammer if not bludgeon? I surrender to the court.
| Weapon | Armor | Prioritize your skills |
|---|---|---|
| Atlas Hammer is a fictional character created by Atlas Hammer | Cap Mizuha | Bludgeoner 3 is the third installment in the Bludgeoner series. |
| Strike that isn’t going anywhere | S Vaik Mail | 7th Attack Boost |
| Water Strike | Braces Tigrex S | 3rd Weakness Exploitation |
| Dash Breaker | Anjanath Coil S | 7th Critical Eye |
| Charge Switch: Strength | S. Ingot Greaves | 3rd Stun Resistance |
While you put 3 points into Bludgeoner, you gain 10% more attack when you’re at green sharpness or below, thus we’ll need a Hammer that only goes to green sharpness. Because of its relatively high raw damage, non-negative affinity, and very huge green sharpness, the Atlas Hammer is our option here. The icing on the cake is that you may grandfather in the Dulling Strike rampage talent from the Bone Bludgeon I before upgrading to the Bone Tree 2. When you’re at green sharpness or below, Dulling Strike has a slight probability of increasing your attack power– which you’ll be all the time.
Earning the final point into Bludgeoner is critical, and then you may focus all of your efforts on getting three more points into Attack Boost to finish. Your affinity isn’t going to be great, but if you have enough charm, Weakness Exploit and Critical Eye may help fill up the gaps. Agitator, on the other hand, may assist you add even more assault.
The Mind’s Eye from the Tigrex arms and Chameleos helmet is here primarily for comfort. Errant assaults that miss the monster’s weak place will bounce and leave you unprotected at green sharpness, therefore this protects you from any targeting errors. You may swap the Tigrex arms for the Rathalos Braces S and the Mizuha Cap for the Bullfango Mask S if you’re feeling secure in your bludgeoning abilities. This will put Mind’s Eye into Attack Boost for two points and free up a slot for even more offense.
Courage Paralysis/KO (Build 5)
 Capcom courtesy of HGG / Jacob Johnson
This build focuses on the flip side of the Hammer, which is securing the monster via KOs. When you combine that with some paralysis build-up, you may keep the monster CC’d while your team takes advantage of the situation by doing massive damage. To get the greatest results, combine this build with other hunts.
| Weapon | Armor | Prioritize your skills |
|---|---|---|
| Rampage Hammer S | Helm, Anjanath S | 3rd Weakness Exploitation |
| Affinity Surge, Paralysis III, and Attack Boost IV | S Anjanath Mail S Anjanath Mail S Anjanath Mail S | 3rd critical boost |
| Water Strike | Anjanath Vambraces S, Anjanath Vambraces S, Anjanath Va | 6th Critical Eye |
| Silkbind Spinning Bludgeon | Anjanath Coil S | 1 Flinch-Free |
| Charge Switch: Courage | S. Ingot Greaves | Sharpening Speed 3 |
Using the Charge Switch: Courage allows each fully charged strike to hit twice and combo into the following charge attack. We may utilize Slugger 3 to cause extra stun damage while striking the monster’s skull, and combine it with 3 points in focus to accomplish wonders for our paralysis build-up. We can convert the greaves to Ingot to obtain some more Attack Boost and Critical Eye with the Anjanath gear, which gives us everything we desire.
Because the armor takes care of Focus and Slugger, you may concentrate on gaining as many affinity skills as possible to avoid taking too much damage. First, put 3 points into Weakness Exploit and Critical Boost, then use Critical Eye to fill up the gaps. Because this setup is designed for multiplayer hunts, investing at least one point in Flinch Free will prevent other hunters from interrupting your combinations.
Another noteworthy mention goes to Silkbind Spinning Bludgeon, which strikes so often that it’s a terrific way to rack up a lot of status. When you have an opening and the head isn’t readily accessible for crushing, use it.
To double-down on your KOs and paralysis build-up, consume Dango Specialist and Dango Slugger before the hunt.
Be a part of the High Ground
That’s our opinion on how to get the most of the Hammer in Monster Hunter Rise. Please share your best Hammer build in the comments, and don’t forget to sign up for our Monster Hunter build tutorials through email!
Kevin Garnett was a McDonald’s All-American and the National High School Player of the Year before he became the first contemporary high schooler to enter the NBA draft in 1995, before he became a 15-time All-Star, and before he finally won his long-awaited NBA championship in 2008. Michael Jordan, Scottie Pippen, and the great Chicago Bulls dynasty all attended Farragut Academy in Chicago, where KG played.
The future MVP and a buddy went seeking for a pick-up game one night and had the audacity to enter a gym where Jordan and Pippen were training.
He got his opportunity to run with the two Hall of Famers that night, to to his surprise, and it didn’t disappoint.
In 1995, Kevin Garnett was the top high school basketball player in the nation.
KG’s path to the NBA was long and arduous.
It all began in South Carolina, where he was one of the last to take up the game. As a junior, he was named South Carolina Boys Basketball Player of the Year. He eventually found himself at Farragut, where he excelled and won the same prize as a senior in Illinois.
Garnett averaged 25.0 points, 17.9 rebounds, 6.7 assists, and 6.5 blocks as a senior, according to Bleacher Report. That foretold every skill KG would demonstrate as a pro, including a smooth jumper, outstanding playmaking skills for a player his stature (6-foot-11, 240 pounds), and defensive domination.
He was ineligible to play collegiate basketball due to his academic standing. As a result, The Big Ticket joined the 1995 draft, at least in part due of those conditions. The Minnesota Timberwolves selected him fifth overall, and he embarked on a 12-year journey with the team. In his first eight seasons, he led the squad to eight consecutive postseason berths.
KG eventually made his way to Boston, where he won an NBA title and the Defensive Player of the Year Award in the same season, and was inducted into the Hall of Fame in 2020.
However, he received a confidence boost before to the draft.
KD sneaked into a Bulls practice and played pickup basketball with MJ and Scottie Pippen when he was a teenager.

Kevin Garnett, a former NBA player, watches a game between the Minnesota Timberwolves and the Portland Trail Blazers during the first quarter. | Getty Images/Hannah Foslien
As Garnett battled to pass his ACTs and pondered how he would get into college, a buddy suggested that getting away from the books and diverting his attention away from studying could be beneficial. As a result, the two agreed to play a game.
Instead of looking for a game, they slipped into a gym where members of the Bulls, including MJ and Pippen, were training.
Garnett stayed on the sidelines for a few moments, watching until a security officer approached him and urged him to go on the court. So he laced up his sneakers and entered a game against the GOAT and a man coming off his greatest scoring season in his career.
In an article by The Undefeated, Garnett recounted the story:
“You’re too young to be out here,” Pippen replies. You’re just in high school.”
“Let’s just go,” Jordan adds. “You protect Scottie,” he adds, pointing to me.
I’m thinking to myself, “Damn, I’m up against my idol.” I’m up against a player that is coming off one of his greatest seasons to date.
Pippen gets the ball first and makes a stuttering motion before unleashing a big-ass three.
I’m thinking, That’s insane; there’s no way he could have hit that shot.
My innate instincts kick in after that. Boom! I’m going to dunk. Boom!
Scottie and I are having a conversation. That makes me even more enraged. I’m thinking to myself, I’m holding my own against a legend. I’m getting confidence as the game progresses. I’m not going down without a fight. No one is going to make a fool of me. With these m************, I’m a competitor. Scottie is a tight, challenging, and demanding opponent for me. I’m right in front of him. I’m behaving as though everything in my life has lead up to this point.
On playing casual basketball with Michael Jordan and Scottie Pippen, Kevin Garnett said
In high school, KG was noted for his defensive ability, among other things. He was tall, long, and unusually athletic for his stature. And he was a tyrant.
Despite being just 18 years old, he utilized such talents to protect a future Hall of Famer in his prime.
“I had one thing to say to the security guard: Thank you,” he said in The Undefeated story.
Garnett went on to become one of the league’s most feared defenders.
https://www.youtube.com/watch?v=OUaXbXD F80
The Big Ticket soon established himself as one of the league’s greatest players. In his career, he averaged 17.8 points and 10.0 rebounds; by his age-20 season, he was averaging 17 and 8. By his sixth season in the league, he had already been awarded First-Team All-Defensive eight times.
When KG averaged 24.2 points, 13.9 rebounds, 1.5 steals, and 2.2 blocks in 2003-04, he was crowned MVP. In terms of thefts and blocks, he is in the top 20 all-time.
It’s certainly no accident that he earned Defensive Player of the Year the same season he, Paul Pierce, and Ray Allen all won their first championships.
And he demonstrated that defensive domination against one of the greatest players in NBA history even before stepping foot on an NBA court — and in front of the GOAT, no less.
Basketball Reference provided all statistics.
‘When you go after Phil Jackson, Michael Jordan, and he came at me a little bit, you’re just going big-game hunting,’ Charles Barkley said of Scottie Pippen’s latest attacks.
Xfinity has a slew of trouble codes, each with its own set of signals that aren’t always apparent. While some are basic and simple to resolve, others fail to disclose the nature of the issue.
System-wide malfunctions, hardware faults, streaming devices, and inadequate internet connections are the most common causes of Xfinity error codes. The good news is that depending on the error number you get, you can resolve most Xfinity issues in a variety of ways.
Rebooting your gadget is the simplest solution. Another option is to seek help from the customer service department. But first, see whether the error code and its solution can be located in this list.
Error codes in the Xfinity TV app and how to resolve them
If you encounter these exact problem codes when using Xfinity, follow the procedures below to resolve them.
RDK-03004 RDK-03004 RDK-03004 RD
A connection error is Error RDK-03004. “We’re experiencing problems connecting to the X1 Platform,” says the notice that accompanies it. Here’s how to get it fixed:
- Examine your cable connections and make sure they’re secure.
- Remove your TV Box from the wall outlet.
- After around 10 seconds, plug the cable back in.
- The gadget will reboot.
Restarting Xfinity TV is another option. Here’s how to do it:
- By hitting the A button on your remote, you may access the Help Menu.
- Select Restart after pressing OK.
- Select Restart again after pressing OK.
The problem will be fixed when your device reboots.
2. RDK 03117 RDK 03117 RDK 03117 RDK
When the main X1 Cable Box does not receive any signal, the error number RDK 03117 appears. Troubleshoot it by double-checking that the wires are securely attached and that your box isn’t broken.
You’ll also need to reset your gateway by unplugging it for around 30 seconds and then plugging it back in. If it doesn’t work, get in touch with the support staff for further help.
APPS-04033 APPS-04033 APPS-04033 APPS
The streaming applications on your smartphone are equivalent with the Xfinity error number APPS-04033. You’re having trouble because the service’s streaming app is being updated.
You’ll have to update your app and try again in that scenario. Here’s how to do it:
- Remove the Xfinity Stream App from your phone or tablet.
- Download the app from the app store on your device.
- Install and launch the app on your smartphone.
To resolve the issue, Xfinity suggests that you update the firmware on your Smart TV.
XRE-03007 XRE-03007 XRE-03007 X
When your account has a billing problem, XRE-03007 appears. Making the appropriate payment, particularly if you have an overdue account, is the quickest approach to resolve it.
However, if you got the notification in error, you should contact customer service or reset your device. Here’s how to reactivate your Xfinity TV.
- Unplug the Box from the power source to turn it off.
- Before plugging it back in, wait at least five seconds.
Alternatively:
- For two seconds, press and hold the Power button.
- Let go of the button.
- To switch your TV back on, push the button again after a few seconds.
You may use the options to solve the problem and try again.
RDK 03033 RDK 03033 RDK 03033 RD
The message “We’re having problems connecting to the X1 Platform” will appear whenever you see error RDK 03033 on your screen. Please try again in a few minutes if this is a temporary issue.”
You might try restarting your TV Box to see if it helps. Here’s how to do it:
- Disconnect the TV Box from the power supply.
- Allow 10 seconds to pass.
- Reconnect the TV Box.
It’s also possible to restart it from the device’s settings:
- On your remote, press the Xfinity button.
- Options for highlighting.
- Select OK.
- Device Settings should be highlighted.
- Select OK.
- Power Preferences are highlighted.
- Select OK.
- Restart is highlighted.
- Select OK.
- Highlight Restart the computer and then choose OK.
- The X1 Welcome Screen appears.
The last channel on your TV Box will be resumed. Use the left, right, or down arrow buttons to highlight a choice.
RDK-03036 RDK-03036 RDK-03036 RD
The error code RDK-03036 is caused by a connectivity problem. The service is unable to connect to your set-top box, according to a lengthy statement.
The following is what you should do:
- Check the tightness of the coax wire attached to the Cable In outlet.
- Hold down the power button for 10 seconds to restart your set-top box.
- To display a welcome message, release the button.
Your device should restart and you should be able to access content again. If it doesn’t work, contact 1-800-Xfinity for assistance.
REF CODE S0A00 REF CODE S0A00 REF CODE S0A00 RE
The REF CODE S0A00 indicates that you have not activated your TV Box or that the activation has been lost. In most circumstances, the problem may be resolved in less than an hour.
If it doesn’t work, try turning on the device.
- Go to xfinity.com/activate to get started.
- Follow the on-screen instructions.
- Before continuing, double-check that you have your Activation details.
Alternatively, you may contact customer care for further information or a fast remedy.
XRE-10007 is the number eight.
“Sorry, that didn’t go as planned,” says the accompanying message with error number XRE-10007.
It’s a common mistake that may be caused by a variety of factors, including weak Wi-Fi signals. There are a few things you can do to attempt to repair it:
- Restart your television set-top box.
- Make sure the Xi5 wireless box isn’t too far away from a wireless gateway.
- Contact a Comcast customer service specialist.
- Request that they verify your account and look into your MOCA network for any technical concerns throughout your conversation.
Another alternative is to phone a Comcast customer service representative and ask for Billing. Next, request that they look into your account to see if there are any concerns.
XRE-00021 XRE-00021 XRE-00021 XRE
A tuning issue is indicated by the XRE-00021 code. When this happens, the notice “There was a difficulty tuning to this station” will appear. “Please change the channel.” During commercial breaks, some users have had this problem.
In other words, if a source is broadcasting an image in a different format, such as MPG2, the channel on which you are seeing the video is MPEG4.
You may adjust your station after the commercial break for up to two minutes. Another alternative is to change the channel and see if it makes a difference.
It’s also possible that Error XRE-00021 is a signal issue. If you can successfully turn to a different HD channel but not the one you’re viewing right now, then the signal problem must be resolved.
Swapping the splinter for the X1 Box is one method to do so. Otherwise, get in touch with the support staff for further information.
RDK 03003 is number ten.
The warning “RDK-03003 – Unable to Connect to XFINITY TV” will appear whenever the RDK 03003 problem occurs. The following approaches may be used to resolve this issue:
- Check that all of the device connections are secure. This includes the coax wire that connects your device to the wall.
- Make that the power cables are connected and plugged into a functional power strip or outlet.
If your devices are properly linked, make sure to activate your services. Here’s how to do it:
- Connect your TV, phone, and computer to the Internet.
- Turn on all of your devices.
- Go to xfinity.com/activate or xfinitymobile.com/activate to activate your service.
- Follow the activation steps step by step.
Reboot your X1 TV Box and try again after troubleshooting the issue and activating your services.
XRE 03059 XRE 03059 XRE 03059 X
“Sorry, we’re experiencing some problems,” says the notice accompanying error number XRE 03059. This channel is currently unavailable. Please change the channel and come back to this one later.”
It’s possible that the issue is caused by a lack of channel availability. It might also be due to a DVR signal problem or your equipment’s inability to tune in to the channel’s frequency.
There are many methods to troubleshoot it:
- Restart your device and attempt again to access the channel.
- Check that all of the cords connecting the devices are secure and in good working order.
- Remove any splinters from your gadget that aren’t needed.
Another option is to replace your box as well as the connection on the coax wire that connects to it. You may also get help from tech support.
XRE-10000 XRE-10000 XRE-10000 XRE-10
If you get error XRE-10000, it signifies your account is lacking rate codes. The mistake is usually accompanied by a notice that says, “Give us a call.” Please contact us at 866-512-2218, and we’ll take care of this for you.”
The problem isn’t caused by your computer, hardware, or a bad internet connection. That indicates there’s nothing you can do to remedy it on your end.
As a result, dial the Xfinity number shown on your screen to have the service take care of a few of your account data and finish your setup.
SRM-0X0011 SRM-0X0011 SRM-0X0011 SRM
When you attempt to view an On-Demand channel, the SRM-0X0011 error number appears.
Most of the time, a simple system refresh or restart will enough. If it doesn’t work, you’ll need to contact a customer service agent for assistance.
Conclusion
You’ll notice an accompanying message when you obtain Xfinity or Comcast problem codes. The notice explains what went wrong and how to repair it.
By restarting your device, you may begin addressing any issues you may have. Also, double-check that all of the wires are connected and finger-tight.
If it doesn’t work, get in touch with the Customer Support Team for help.
Related

On October 22, 2021, Sequoia and Kings Canyon National Park Superintendent Clay Jordan hugs the General Sherman great sequoia tree in Sequoia National Park in Three Rivers, California, before it is unwrapped during the KNP Complex Fire. (AFP Photo/Patrick T. FALLON) (Photo courtesy of AFP/PATRICK T. FALLON via Getty Images)
LOS ANGELES, Calif. (AP) — Officials reported Friday that lightning-sparked wildfires destroyed thousands of huge sequoias this year, resulting in a stunning two-year death toll that accounts for roughly a fifth of the world’s biggest trees.
READ MORE: The Santa Clarita Valley Is On High Alert Because Of Strong Winds
Fires in Sequoia National Park and the neighboring Sequoia National Forest ravaged more than a third of California’s groves, destroying an estimated 2,261 to 3,637 sequoias, the world’s biggest trees by volume.
Last year, wildfires along the Sierra Nevada range destroyed an unprecedented 7,500 to 10,400 giant sequoias, which are only found in around 70 groves distributed over the western side of the range. The 75,000 sequoias with a diameter of more than 4 feet (1.2 meters) have been lost, accounting for 13 percent to 19 percent of the total.
Blazes that are hot enough and high enough to destroy so many enormous sequoias — trees that were formerly thought to be fire-resistant — put a cap on climate change’s influence. A warming world, which has resulted in harsher droughts, paired with a century of fire suppression, which has strangled forests with heavy undergrowth, has ignited fires that have rung the death knell for ancient civilizations’ trees.
“The somber fact is that we have witnessed another massive loss within a limited population of these famous trees that are irreplaceable in many lifetimes,” said Clay Jordan, Sequoia and Kings Canyon National Parks superintendent. “As magnificent as these trees are, we must not take them for granted.” Some effort is required to guarantee that they are available for our children, grandchildren, and great-grandchildren.”
In the last five years, California has seen its most severe wildfires. Last year established a record for the most acres burnt, and this year is already in second place.
This year’s tree fatalities may have been far worse if the fire hadn’t been slowed by heavy rain and snow on October 25. Last year, fires raged from August to January.
After the Castle and SQF Complex fires caught authorities off guard last year — and even some tree enthusiasts to tears — more precautions were made this year to rescue the biggest and oldest trees.
Foil sheets were draped over the General Sherman tree, the world’s biggest living object, and other ancients that serve as the background for images that seldom convey the beauty and magnitude of the gigantic sequoias.
A fire-retardant gel, similar to the absorbent used in newborn diapers, was sprayed over canopies that could reach heights of more than 200 feet (60 meters). Sprinklers were used to water the trunks, and combustible materials were swept away from the trees.
The techniques helped save the Giant Forest, the park’s most famous grove of huge trees, but they couldn’t be used elsewhere.
In the Marble Fork of the Kaweah River drainage, the majority of the Suwanee grove in the park was destroyed by fire. The Sequoia National Forest’s Starvation Complex of groves was substantially devastated.
In Kings Canyon National Park’s Redwood Mountain Grove, the most damage was done. The blaze became so large that it formed a fire cloud that blew 60 mph (97 kph) gusts.
According to Christy Brigham, head of resource management and research for the parks, a fire ecologist properly forecasted the sections that would burn the hottest, but nothing could be done in such irregular circumstances to rescue trees in the second-largest grove.
READ MORE: A Police Pursuit Eliminator Could Disable Cars and Save Lives on the Road
“It’s much more distressing to me because we were aware of it and couldn’t safeguard it,” Brigham said.
The worst-affected groves resemble wood cemeteries, with burnt trees towering high into the sky. The brilliant green of the canopy has faded to a rusty brown. Many of the trees that have been injured are projected to die in three to five years.
The Red Hill Grove of the Save the Redwoods League, which lost the Waterfall tree — one of the world’s biggest — in 2020, also experienced losses this year.
“This issue in the huge sequoia has to be called what it is: an emergency,” said league President Sam Hodder. “It was unheard of only a few years ago to lose a few of gigantic sequoia trees to wildfire in a season, but today we’re losing hundreds.”
According to Brigham, the park conducted climate modeling in 2013 that indicated catastrophic fires would not threaten sequoias for another 50 years. But it was only the beginning of a painful five-year drought that effectively shattered the model.
For the first time in the park’s history, gigantic sequoias were set ablaze in 2015 due to the drought. More huge sequoias were killed in 2017 by two fires. The flames destroyed just over 200 enormous sequoias and acted as a forewarning of what was to come.
“Then there came the Castle Fire, and it was like, ‘Oh, my God,’” Brigham said. “We went from a warning sign to hair on fire in a matter of minutes.” It’s insane to lose 7,000 trees in one fire.”
Because workers were determining how many trees perished when lightning hit Sept. 9, causing the Windy Fire in Sequoia National Forest and two fires that combined to create the SQF Complex in the park, Brigham said, an exact mortality figure from last year is not available.
The news about the flames in the park’s report wasn’t all bad.
While fires engulfed 27 groves, destroying vast numbers of trees, a lot of low-intensity fire, which sequoias need to survive, will clear away vegetation and heat from flames will open cones, allowing seeds to spread.
In several of the groves where the park has consistently employed controlled fire to clear away accumulated vegetation under cooler and more humid circumstances, there was also less damage. These achievements highlighted the need to extend that effort and, when it is too hazardous, begin thinning trees, according to Jordan.
However, locations where the fire was so intense that seeds were destroyed and trees were unable to regrow may need further assistance. The park is contemplating planting seedlings for the first time to help conserve the species.
Brigham said, “I’m not ready to lose up on huge sequoias.” “Because the fire is approaching, this is a call to action to better safeguard the remaining old growth and make our Sierra Nevada forests flame resistant.”
However, planting saplings will take hundreds of years to replace the trees that have been gone.
MORE NEWS: 66-Year-Old Palms Man Missing
(The Associated Press, Copyright 2021.) All Rights Reserved by the Author. It is forbidden to publish, broadcast, rewrite, or disseminate this content.)
When they were first released, Warmind-generating Armor Mods were a game-changer. You may suddenly start creating gigantic orbs that vary from explosive to health restoration if you have the appropriate combination. While they’re no longer the hottest new build in Destiny 2, their compatibility with Ikelos and Seventh Seraph weaponry keeps them relevant.
When the Seventh Seraph was initially released, it was quite popular. Not just because of the Warmind Cells’ advantages, but also because of the unique stats and weapon frames. The first Perk rolls were full of crap, but after more than a year, they’ve been tweaked to produce some fantastic rolls. Everything you need to know about Seventh Seraph weaponry, including how to get them and which God Rolls to avoid.
How to Get Weapons from the Seventh Seraph
Weapons of the Seventh Seraph were first presented in Season of the Worthy. They were all linked to Rasputin-related activities, with all six weapon kinds being accessible throughout the course of the season. Two were linked to the Season Pass, while the others could be purchased from Rasputin for a high price or unlocked through completing Bunkers.
 Bungie (photo)
Similar to the Umbral Engram system for Trials, if you unlocked all six, you might gain more rolls via various activities. Completing weekly Rasputin bounties, Legendary Lost Sectors, or the Seraph Tower Public Event were all examples of this. The main difficulty at the time was that there was no definite means for unlocking each weapon other than buying it.
Season of the Worthy activities have now been retired, and weapons from the Seventh Seraph have been moved to the World Loot Pool. That means you may get a Seventh Seraph weapon at any time by completing Public Events, leveling up, playing tasks, and improving your reputation with the Gunsmith, among other things.
Earning rank-up packages from Banshee-44 is the greatest way to grind out possible Seventh Seraph rolls. To acquire a level, you just need to turn in 100 weapon components, which you may get by destroying undesirable weapons and armor. While there is no certainty, it is surprisingly simple to collect weapon components just by playing, enabling you to complete numerous levels in one sitting. It’s also worth keeping an eye out for when any Seraph weapons rotate into Banshee’s inventory, allowing you to buy them again and over again.
The Seventh Seraph God Rolls to Keep an Eye on
Since their release, times have changed, and the six Seventh Seraph weapons now have better, more particular rolls to watch out for. Here are our recommended builds for each weapon.
Roll of the Seventh Seraph Carbine — Auto Rifle God
 Bungie courtesy of HGG / Kody Wirth
The Precision Frame of the Seventh Seraph Carbine makes it one of the most well-balanced Auto Rifles on the market. It’s designed for longer-range gaming. Unfortunately, it has a smaller magazine, a lower impact, and a strong recoil, so you’ll have to choose between minimizing those concerns and focusing on the range, handling, and stability.
To begin, choose either the Chambered Compensator for mild stability and recoil enhancements in return for a handling drop, or the Extended Barrel for increased range and recoil in exchange for a bigger handling drop. Either of these may be improved by changing the magazine you use, which either extends your clip size or improves your range somewhat.
Look for Fourth Time’s a Charm, Rampage, or Swashbuckler when it comes to Perks. Fourth will maintain your mag full as long as you score precise strikes, which links in with the other Perks’ effects of increasing damage in various ways. In summary, Swashbuckler is better for PvP because of the various ways it may explode, but Swashbuckler is better for PvE since you can chain several hits more quickly.
- Extended Barrel or Chambered Compensator Barrel
- High-Caliber Rounds or Appended Magazine
- Perk 1: It’s the Fourth Time’s a Charm
- Perk 2: Swashbuckler/Rampage
Hand Cannon God Roll — Seventh Seraph Officer Revolver
 Bungie courtesy of HGG / Kody Wirth
The Seventh Seraph Revolver is a fast-firing Hand Cannon, more akin to a show-stopping Sidearm. It has a large recoil and isn’t very helpful at extended ranges. To take advantage of the quick-firing rate, you’ll want to improve your accuracy across longer distances while minimizing recoil.
This is exactly what Corkscrew Rifling and Fluted Barrel do. Either a significant increase in range, handling, and stability, or a greater increase in handling. Your mag selection is entirely dependent on whether you want an incredibly huge clip or one that is somewhat larger but has more stability and reload speed. Both options are important, and it all depends on what you want to do with your Barrel.
Choose between Threat Detector and Feeding Frenzy for your Perks, or Ambitious Assasin and Multikill Clip. The first combination is great for close combat and can be used in both PvE and PvP if you can score quick kills and remain near. The latter is preferable for PvE, since quick kills may increase clip size and damage, resulting in a continuous output loop.
- Rifling: Corkscrew Rifling or Fluted Rifling
- Tactical Magazine or Appended Magazine
- Perk 1: Threat Detector or Assassin with Ambition
- Perk 2: Multikill Clip or Feeding Frenzy
Shotgun God Roll — Seventh Seraph CQC-12
 Bungie courtesy of HGG / Kody Wirth
The stats of the Seventh Seraph Shotgun are exceptionally well-balanced. It’s designed to move with you, delivers a big punch, and has very little recoil. Focus on stability, clip size, and damage output to improve it even more.
To begin, choose a Barrel that will maximize your range, steadiness, and control. Then select if you want more firing rate or more stability and reload time by increasing your clip size. The rest is up to you to figure out how you want to play with Shotguns.
Take advantage of the Slideshot Perk’s benefits if you like sliding while in battle. Use an Auto-Loading Holster if you want more opportunities to shoot. Then, to improve your damage output against more challenging adversaries, try landing Vorpal Weapon. It’s the only really fantastic Perk in the second slot, but things might be a lot worse.
- Corkscrew Rifling Barrel
- Tactical Magazine or Assault Magazine?
- Perk 1: Auto-Loading Holster or Slideshot
- Vorpal Weapon (Perk 2)
SI-2 — Sidearm God Roll — Seventh Seraph
 Bungie courtesy of HGG / Kody Wirth
Unloading the clip and fast reloading are the foundations of a competent Sidearm. You want to be able to fire as rapidly as possible, knowing that you have enough ammunition or can easily add more. Furthermore, you must balance the range and kick of this weapon in order to maintain your fire precise and capable of dealing with foes from a greater distance.
Fluted Barrel will assist you in resolving your concerns with handling and stability. Extending it with a Tactical Mag or an Appended Mag is possible, but the option is solely based on how much ammunition you desire. Then it’s up to you to select how the Perks should be used to enhance the weapon.
Full Auto Trigger will make it into a rapid-fire weapon if you desire a quicker shooting rate. If you’re concerned about close combat and overall numbers, Threat Detector is the way to go. Finally, regardless of the option you chose for the first, attempt to land Dragonfly. As a consequence of the emphasis on accuracy and explosive damage, the already lethal rapid-fire weapon may become a true powerhouse.
- Arrowhead Brake Barrel
- Tactical Magazine or Appended Magazine
- Perk 1: Threat Detector or Full Auto Trigger System
- Dragonfly is the second perk.
SMG God Roll — Seventh Seraph VY-7
 Bungie courtesy of HGG / Kody Wirth
For Warmind builds, SMGs are ideal. Perhaps the strangest aspect of this one’s design is how it’s designed for a greater range yet lacks impact, control, and reload speed.
The Fluted Barrel will assist in resolving the issue of stability and handling. Your clip option, like the Shotgun, is entirely dependent on whether you want to simply enlarge your clip or further balance out your basic stats with a minor mag boost.
Then there’s the added bonus of the Perks. Firmly Planted, which emphasizes efficient crouch play for advantages, is one of the unique choices in this SMG. If you add in Feeding Frenzy, you’ve got yourself a very good method to improve your reload time if you’re playing it right.
- Fluted Barrel is a kind of barrel.
- Tactical Magazine or Appended Magazine
- 1st Advantage: Well-Planted
- Feeding Frenzy is the second perk.
Machine Gun God Roll — Seventh Seraph SAW
 Bungie courtesy of HGG / Kody Wirth
At this time, the SAW is a well-known Machine Gun. It has a longer range and a slower but more powerful fire rate. All of this comes at the cost of lesser stats on almost everything else, making it more equivalent to a Grenade Launcher or Linear Fusion Rifle.
To begin, concentrate on improving your handling and making a concerted effort to reduce recoil. Then, to lengthen action scenes and enhance range and stability, make sure you maintain any rolls with Ricochet Rounds. You have a few alternatives from there.
If you’re actively crouching between firefights to trigger the boost, Field Prep is ideal. The Auto-Loading Holster is also important, but it requires you to change your weapon, therefore you’ll need to concentrate on improving your weapon changeover speed using Mods. Choose either Vorpal Weapon or Firing Line for the second Perk slot. You already know how Vorpal Weapon works and why it’s beneficial, but Firing Line is different in that it enhances damage when your squad is nearby. The Perks aren’t flawless, but they’re good enough to run in PvE.
- Arrowhead Brake Barrel
- Ricochet Rounds is a magazine about ricochet rounds.
- Perk 1: Auto-Loading Holster or Field Preparation
- Perk 2: Firing Line or Vorpal Weapon
The weaponry of the Seventh Seraph are common for Warmind Cell builds and are nonetheless worth picking up as you go through the game. While landing certain rolls in the World Loot Pool might be difficult, you now know what to look for. Share this post on your favorite social media channels to assist your Fireteam in finding the perfect Seventh Seraph role, and join up for our newsletter to stay up to date on all things Destiny 2.
Have fun gaming!
The Jordan Rules, a book written by Sam Smith in 1991, had the potential to ruin the Chicago Bulls. Michael Jordan’s reputation was damaged in the book, which also chronicled Chicago’s locker room turbulence during the 1990-91 championship season.
Jordan first paid little attention to the specifics of Smith’s contentious tales. However, the ever-motivated MJ eventually attributed the book as a major factor in the Bulls’ triumph in 1991-92.
Smith foresaw the whole scenario.
The Jordan Rules painted Michael Jordan and the Bulls in a negative light, while the book’s author claimed that it might bring the team together.
After winning the 1991 NBA championship, Michael Jordan and the Chicago Bulls basked in their triumph.
Jordan finally got his illusive ring after years of postseason sorrow and doubts about his ability to lead the Bulls to a championship. It propelled him into the same class as Magic Johnson and Larry Bird. The joy of victory must have been overwhelming.
Those ecstatic sentiments did not endure long.
In November 1991, just before the 1991-92 season began, Chicago Tribune beat reporter Sam Smith published The Jordan Rules. The book follows Chicago’s journey to its first championship. Jordan’s “nice guy” image was also harmed.
Smith writes extensively on MJ’s contempt for Will Perdue and his previous dispute with Bill Cartwright. In addition, the novel depicted a disgruntled Horace Grant, who was often used as a scapegoat by the Bulls.
The book immediately rose to the top of the New York Times bestseller list, as shown in ESPN’s The Last Dance documentary. In the documentary, Smith claims that the Tribune forbade him from reporting to work after he received threats.
Smith, on the other hand, did not write the book with malice in mind. Instead, he predicted that Phil Jackson would utilize it to unite and rally his squad in the pursuit of a championship.
Jordan dismissed the book at the time, but subsequently confessed that it had an influence on his performance.

After the Bulls beat the Portland Trail Blazers in Game 6 of the 1992 NBA Finals, Michael Jordan speaks with the media | Focus on Sport/Getty Images
Michael Jordan, like several of his Bulls colleagues, first regarded the book with skepticism.
Jordan remarked (h/t Internet Archive) he would “laugh” at Smith’s evidence in a story published in the Chicago Sun-Times on Nov. 15, 1991.
Jordan noted at the time, “We as a team know what the truths are.”
Some of MJ’s colleagues seemed to be in a similar situation. The finest series of fictitious tales “since Mother Goose,” according to former Bulls player Stacey King, who is depicted in the book as having threatened Jordan.
The book, on the other hand, had an effect on people’s minds. Jordan said as much in an interview televised on Christmas Day 1991 during a game against the Boston Celtics (h/t YouTube). After the advent of The Jordan Rules, he stated that basketball was a bit less enjoyable.
Behind the scenes, all of the drama and the weight of certain disclosures took their toll. On the court, though, the Bulls dominated and shown a feeling of teamwork.
By acknowledging Smith’s point, Jordan demonstrated that he was correct. The Bulls were brought together by the Jordan Rules.
If there were any flaws in the foundation, Michael Jordan and the Bulls never revealed it on the court.
Chicago started the 1991-92 season by losing two of its first three games, but then went on a 14-game winning streak. The Bulls were 39-9 at the All-Star break and ended the season with a franchise-record 67 victories.
Despite the fact that the playoffs were more difficult, Jordan and his teammates stayed united. Unheralded bench guys, in fact, aided a stunning comeback in Game 6 of the NBA Finals against the Portland Trail Blazers.
The scene suggested a squad that was considerably more cohesive than split. Jordan recognized the book’s influence in that respect in a 1993 film called Air Time (h/t YouTube) (9:20 mark).
“If anything, [The Jordan Rules] drew us closer together… by keeping what occurs between these 12 players and 15 individuals inside us rather than allowing others to enter that circle.” As a result, it brought us closer together, and we were more focused on basketball.”
Air Time, Michael Jordan (1993)
The Bulls enjoyed one of their finest seasons ever, with Michael Jordan praising the book as a driving force behind their success. If you ask Sam Smith, he’ll tell you that’s exactly what he meant.
Basketball Reference provided the statistics.
‘They Knew They Were Gonna Win, and I Think We Had That Same Attitude,’ Michael Jordan said after the Bulls won their first NBA title.
Watch This Video-
The “sinister hammer monster hunter rise” is a powerful hammer that can be used for both attacking and defending. The weapon features a unique attack style that uses the player’s momentum to increase the power of its attacks.
Frequently Asked Questions
What is the best hammer in Monster Hunter rise?
A: The best hammer in Monster Hunter rise is the one that you feel most comfortable with. There are many different hammers within each weapon class, so your answer will depend on which type of gameplay you want to play for this series.
How do you hammer MH rise?
A: It is a good question. To hammer on the Rise, you must first hold down your left trigger and press jump with your left analog stick. Then you can use the right analog stick to scroll up or down depending on if its easier for you to hit those notes that way or not.
What is the best weapon in Monster Hunter rise?
A: That is up to the player. It depends on their style of play and what they are trying to accomplish with each weapon type, but some weapons considered more versatile than others include the longsword, hammer, lance, great sword
Related Tags
- mh rise best hammer reddit
- monster hunter rise hammer tree
- best skills for hammer mh rise